Mar 29, 2007

Cocoa Application with custom Core Image filter 4: packaging the filter as an Image Unit

Greetings to all from my remote village. This month is turning out to be incredibly busy, so I'm glad to finally be posting this entry. Last time in the village, we introduced QuartzComposer to test the convolution filter. Now, it's time to package it into an Image Unit. In Core Image, an Image Unit is a way to provide an image processing function as a plug in so that any application in the system that uses Core Image can find and use its function.

Xcode provides an easy way to get started by providing a project template for an “Image Unit Plug in for Objective-C” under “StandardApplePlugins” in the XCode project window.
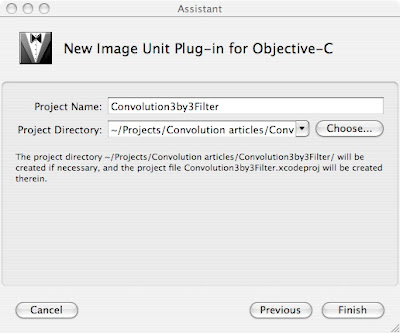
When this project is created, it already contains some stub Objective-C code, which we will never touch, An example kernel which will be deleted, and some .plist and .strings files for localization. There are two types of filters, executable and non-executable filters. Non-executable filters run entirely on the GPU and therefore there is no need for any objective-C code in the filter. A nonexecutable filter is determined if all “sample” calls in the filter are of the form color = sample(someSrc, samplerCoord(someSrc)); Since the sample instructions in our filter are of the form: sample(src, (samplerCoord(src) + loc)) which does not match the nonexecutable form, we have an executable filter.

For an executable filter, only the version number, filter class and filter name are read from the Description.plist file. The other parameters need to be defined in an Objective-C subclass of CIFilter. Here's the interface to that class:


#import <QuartzCore/QuartzCore.h>
#import <Cocoa/Cocoa.h>
@interface Convolution3by3: CIFilter
{
CIImage *inputImage;
NSNumber *r00;
NSNumber *r01;
NSNumber *r02;
NSNumber *r10;
NSNumber *r11;
NSNumber *r12;
NSNumber *r20;
NSNumber *r21;
NSNumber *r22;
}
- (NSArray *)inputKeys;
- (NSDictionary *)customAttributes;
- (CIImage *)outputImage;
@end


So, we declare our input parameters and override 4 methods: init, inputKeys, customAttributes, and outputImage. The names inputImage and outputImage are defined by convention and are used with key-value coding to call your filter. Also, filter processing is done in the outputImage method so that the filter is processed lazily - results are only generated as requested. Here's the implementation of init:


#import “Convolution3by3.h“
@implementation Convolution3by3

static CIKernel *convolutionKernel = nil;

- (id)init
{
if(convolutionKernel == nil){
NSBundle *bundle =
[NSBundle bundleForClass:[self class]];


NSString *code = [NSString stringWithContentsOfFile:
[bundle pathForResource:@“Convolution3by3“
ofType:@“cikernel“]];

NSArray *kernels = [CIKernel kernelsWithString:code];

convolutionKernel = [[kernels objectAtIndex:0] retain];
}
return [super init];
}


The init method loads the cikernel code out of the bundle and loads it into the static convolutionKernel variable. It is possible to define multiple kernels in a single cikernel file if you wanted to, but I would probably keep them separate in most cases.

The inputKeys method simply returns an array of parameters for the filter:


-(NSArray *)inputKeys
{
return [NSArray arrayWithObjects:@“inputImage“,
@“r00“, @“r01“, @“r02“,
@“r10“, @“r11“, @“r12“,
@“r20“, @“r21“, @“r22“, nil];
}


By far the longest method of the Image Unit is the customAttributes method where we return a NSDictionary containing a separate NSDictionary for each of the filter parameters. Here's what it looks like:


- (NSDictionary *)customAttributes
{
NSNumber *minValue = [NSNumber numberWithFloat:-10.0];
NSNumber *maxValue = [NSNumber numberWithFloat:10.0];
NSNumber *zero = [NSNumber numberWithFloat:0.0];
NSNumber *one = [NSNumber numberWithFloat:1.0];

return [NSDictionary dictionaryWithObjectsAndKeys:
[NSDictionary dictionaryWithObjectsAndKeys:
@“NSNumber“, kCIAttributeClass,
kCIAttributeTypeScalar, kCIAttributeType,
minValue, kCIAttributeSliderMin,
maxValue, kCIAttributeSliderMax,
zero, kCIAttributeDefault, nil],
@“r00“,
...


This repeats for all 9 parameters, the only one that is different is r11, which is the center parameter. The value of this parameter defaults to 1, so that by default the filter returns its input unaltered.


...
[NSDictionary dictionaryWithObjectsAndKeys:
@“NSNumber“, kCIAttributeClass,
kCIAttributeTypeScalar, kCIAttributeType,
minValue, kCIAttributeSliderMin,
maxValue, kCIAttributeSliderMax,
zero, kCIAttributeDefault, nil],
@“r22“, nil];
}


As you can see, the attributes of the filter include minimum and maximum slider values in case you wanted to build a dynamic user interface for the filter. These constants are all defined in CIFilter.h.

The final method is the outputImage method. It is very simple:


- (CIImage *)outputImage
{
CISampler *src=[CISampler samplerWithImage:inputImage];
return [self apply: convolutionKernel, src,
r00, r01, r02,
r10, r11, r12,
r20, r21, r22, nil];

}


All we do here is get a sampler for the input image and call apply: with the kernel and all the parameters. This call returns our resulting image.

Once you've compiled this filter you can make it available to the system by placing it in the /Library/Graphics/Image Units folder, or for just your user in ~/Library/Graphics/Image Units. Next time we will see how we call this image unit from a Cocoa program.

Mar 18, 2007

All the Cocoa programming that could be crammed into 5 days

I just spent the last week attending the Cocoa bootcamp from Big Nerd Ranch. I have one thing I'd like to clear up before I get started. The hat is just a prop. That's right, when you go to WWDC and you see Aaron Hillegass walking around with his big texas style cowboy hat, he's doing it for marketing purposes. I guess it works, because when I decided to get some Cocoa training, I remembered Aaron and the hat walking around the Moscone center and on the back of his book: Cocoa(R) Programming for Mac(R) OS X (2nd Edition)

Now, I'm not normally a fan of technical training. Give me a book and a web browser and a project and I'm good. Of course this leads to interesting situations like the time I reverse engineered the Windows virtual to physical address mapping structures while not knowing how to refresh an explorer window (It's F5, right?).

I've been poking around in Cocoa for a while now, and though I feel like I made some decent progress, I'm really interested in this technology and wanted to get a comprehensive overview of it from an expert. Sometimes you just want to do things “right.” I figured that in 5 days I'd get a quick but comprehensive overview of most of the technologies in Cocoa from a well known expert in the technology.

The course did not disappoint. We dove right in to code, with Aaron leading us through an example application immediately, before even lecturing. All the lectures were relatively short, and most of the time in the class was spent actually coding. We mostly followed along with the exercises in the book, but we were encouraged to explore and change things as we progressed. In four and one half days we covered nearly the entire book, as well as several additional chapters that were part of the course materials.

In the evenings, most people chose to come back to the classroom and either continue to work on the exercises or to work on a personal project. Aaron typically stayed around until about 10PM answering questions and being generally helpful.

Out on our daily walk (image courtesy of Paul Warren)

The people who took the class came from all over the country and the UK and had varied backgrounds and skill levels, but overall, they were extremely competent and interesting folk. It was enjoyable to meet each of them. I was surprised at how many people were paying their own way to take this class, which was not an insignificant investment in personal time and money. I estimate that about half of the people were there on their own ticket.

The price of the course covers ground transportation to and from the airport, lodging and all meals as well as a copy of Aaron's book and course materials. If you don't want to bring your own computer, a modern iMac will be provided for you to use.

View from my suite

The place we stayed, Serenbe Southern Country Inn, was probably one of the nicest places I've ever stayed. My personal suite had a screened in porch, a kitchen, a large living room with fireplace, a king size bed, whirlpool tub and huge glass shower. They fed us three excellent meals each day, along with snacks and drinks as we wanted them through the day.

I really benefited from this class. Some topics seem complex when you try to explore them on your own, but Aaron was able to make them very accessible. Cocoa Bindings had always seemed somewhat inscrutable to me, but now things are much clearer. The Undo Manager in Cocoa is amazing; it really showcases how a dynamic language can be leveraged to make something that can be hard in other frameworks really easy. And I now feel like I understand how to build custom Views - something that always seemed difficult to me but is actually quite straightforward now.

The idea of a total immersion environment, with all details taken care of and few distractions, along with a very experienced and patient instructor, leads to a learning environment that encourages success. I highly recommend this class to anyone who would like to learn Cocoa.

Mar 10, 2007

Cocoa Application with custom Core Image filter 3: Testing the kernel with QuartzComposer

In the last post I wrote a convolution kernel for Core Image. But these kind of things need to be tested. Now, we could package the filter inside an Image Unit (which I'll do in a future post) but that would mean we would have to recompile and install the filter each time we wanted to make a change. It would be much better if there was an interactive environment that could be used to test any changes and to allow us to debug the filter code.

Luckily, Apple has provided just such an environment in QuartzComposer. If you are not familiar, Quartz Composer is an amazing application that provides a visual programming environment that allows the creation of all kinds of visualizations. If you've seen the RSS screensaver. then you've seen a QuartzComposer composition. If you've seen a preview of Time Machine, the swirling galaxy in the background is a QuartzComposer composition. I'm not going to explore this amazing piece of software in depth here, I suggest you look at some of these websites for more information: Quartz Composer Journal or www.quartzcompositions.com or boinx or Quartonian.

As a basic introduction, a composition is defined by dragging patches onto the workspace and connecting them together graphically. Patches contain ports which represent parameters which are passed between the patches. The results are displayed in real time in the viewer window, so you get immediate feedback as you change things. As we'll see later, Quartz composer compositions can be embedded in a QCView in your Cocoa apps, and controlled via Cocoa Bindings.

I've provided a link to my test.qtz composition which consists of four patches. The convolution patch is built by dragging a core image kernel patch onto the editor and then copying the text of the kernel into the patch. You can use the inspector to change the input parameters to adjust the coefficients and test out the composition.


This is the editor window, showing the composition.


Here's the inspector for the Convolution patch showing where you put the kernel code.


This is the viewer, showing the input image filtered by the edge detection filter defined in the Input Parameters to the Convolution filter.


If you have an iSight camera or other video source, replace the Image Importer with a video input, and you will see the convolution filter applied to your video stream in real time. That's just extremely cool.

Here's the editor window with a Video Input instead or the Image Importer.
And here's a view of my living room with edge detection. Notice the frame rate of nearly 60 frames per second on my Mac Book Pro.

Using this basic composition, with some modifications, you should be able to test out any core image kernel you can come up with. Next time, I'll build this filter into an image unit that can be used from any application that uses Core Image filters.

Mar 9, 2007

Off to Cocoa Bootcamp

Next week I'm headed off to Cocoa Bootcamp from Big Nerd Ranch. I've been poking around in Cocoa for a while and I know parts of it pretty well, but I've decided to get a solid foundation moving forward. From what I have heard from friends, their classes are excellent.

Mar 5, 2007

Cocoa Application with custom Core Image Filter 2: Implementing the convolution kernel

I this post I'm going to implement our convolution filter as a Core Image kernel. Writing a Core Image kernel is relatively straightforward, as I think you'll see. Core Image kernels are written in a subset of the Open GL Shading language, which is basically just C with some added data types a few keywords and function calls. Apple's Core Image Kernel language reference describes the subset that you can use and also the parts of OpenGL shading language that are not implemented. Of note, are the lack of arrays and structures and severe restrictions on looping and conditionals. The vector types like vec3 and vec4 which provide vector types (very convenient to hold the R,G,B,alpha of a pixel) and the sampler which allows you to sample the image


A Core Image kernel has but a single pixel as its output, and is therefore applied once for each pixel in the output. So, you can sample any input pixels from as many input images as you want to generate your output pixel. The filter has to be expressed as a mapping from any set of input pixels to each single output pixel. In our case, this is not a problem. 3x3 Convolution is a pretty natural fit for Core Image, since we only have to sample the 9 pixels immediately surrounding any output pixel. So the first step in our code is to declare the header of the kernel:


kernel vec4 Convolution3by3(
sampler src,
float r00, float r01, float r02,
float r10, float r11, float r12,
float r20, float r21, float r22)
{
vec2 loc;
vec4 result = vec4(0,0,0,1);
//0,0 in my mind is left and up.

I declare a kernel called Convolution3by3. The kernel takes a src argument that represents the source image and 9 floats, which represent the 9 coefficients of the convolution. You can see that lack of support for arrays would make a 5x5 or 7x7 convolution quite cumbersome with this system. We also declare a loc variable to hold our current location and a vec4 for the result.

To perform the convolution, we need to sample the pixels, multiply them by the correct coefficient, and add that value to the result. We've made the conscious decision to maintain the alpha (transparency) value of the result pixel as the alpha value of the center input pixel. Here's the code for the first operation:


loc = vec2(-1.0,1.0);
vec4 p00 = unpremultiply(
sample(src,(samplerCoord(src) + loc) ));
result.rgb = p00.rgb * r00;


What's going on here? First, we call samplerCoord() to get the location that the current output pixel represents. Adding the loc to it allows us to grab the correct pixel in the matrix for this coeficient. Next, we call sample()to get the actual value of the pixel at that location. Core Image gives us pixel information with premultiplied alpha, which means that any transparency has been already multiplied through any RGB values for the pixel. This is a useful optimization since it makes compositing simpler. Since we are going to be using the alpha of the center pixel as the output of the result, we need to reverse this to correctly calculate the convolution, thus the call to unpremultiply(). Finally. we multiply the RGB values of the pixel by the coefficient for that pixel and add it to the result. This process is repeated for each sampled location.


loc = vec2(0.0,1.0);
vec4 p01 = unpremultiply(
sample(src, (samplerCoord(src) + loc) ));
result.rgb += p01.rgb * r01;

loc = vec2(1.0,1.0);
vec4 p02 = unpremultiply(
sample(src, (samplerCoord(src) + loc) ));
result.rgb += p02.rgb * r02;

loc = vec2(-1.0,0.0);
vec4 p10 = unpremultiply(
sample(src, (samplerCoord(src) + loc) ));
result.rgb += p10.rgb * r10;

vec4 p11 = unpremultiply(
sample(src, (samplerCoord(src)) ));
result.rgb += p11.rgb * r11;
result.a = p11.a;


Notice here that I copy the alpha from the input pixel to the result.


loc = vec2(1.0,0.0);
vec4 p12 = unpremultiply(
sample(src, (samplerCoord(src) + loc) ));
result.rgb += p12.rgb * r12;

loc = vec2(-1.0,-1.0);
vec4 p20 = unpremultiply(
sample(src, (samplerCoord(src) + loc) ));
result.rgb += p20.rgb * r20;

loc = vec2(0.0,-1.0);
vec4 p21 = unpremultiply(
sample(src, (samplerCoord(src) + loc) ));
result.rgb += p21.rgb * r21;

loc = vec2(1.0,-1.0);
vec4 p22 = unpremultiply(
sample(src, (samplerCoord(src) + loc) ));
result.rgb += p22.rgb * r22;

result = premultiply( result );
return result;
}

Finally, I premultiply() the result with the alpha value and return the result. As you can see, this is a pretty straightforward procedure: grab the values for each input pixel in the matrix, multiply them by their respective coefficients, accumulate the results and return.

If you want to download a copy of this kernel, it's available on my website: Convolution3by3.cikernel In my next post I'll describe how to test the kernel using the QuartzComposer application and also show how to apply this filter to live video as well as static images.

Mar 1, 2007

Cocoa application with custom Core Image filter 1: What is image convolution?

Before I delve into development of my Core Image kernel, I think I would like to give a quick description of image convolution. There are plenty of resources on the internet that already describe the mathematics of this procedure in great detail, such as Image Processing Fundamentals - Convolution-based Operations. A Google search will reveal a wealth of information.

While it's easy to get lost in the mathematics, performing an image convolution filter is a relatively simple operation. Basically you apply a multiplier to a matrix of pixels surrounding each destination pixel and add them all together. The result of this operation is the new value of the pixel at the center. For the purposes of these articles, we will be sticking with a simple 3x3 matrix, but there is no reason why you can't perform this type of filtering with larger matrices.

Here are some examples of 3x3 convolution applied to an image:

This first example shows an edge detection algorithm

This second one shows a sharpness kernel.
I find the easiest way to think about this is that the coefficients provide the weight that that particular pixel contributes to the final result. If you are interested in interactively exploring this concept, I recommend this site: Molecular Expressions Microscopy Primer: Digital Image Processing - Convolution Kernels - Interactive Java Tutorial. It's got some great interactive tutorials.

In the next post I'll build the Core Image kernel using the OpenGL shading language.