An other way of feeding input and getting output from a composition is by publishing input and output parameters from your compositions. In the most simple sense, these will allow Quartz Composer itself to present a simple UI to allow you to interact with your composition. For example, in my test.qtz composition, I publish the inputImage and all the coefficients so that QC can provide a simple user interface.
More interesting than this, however, is the use of a composition embedded within a QCView and accessing its parameters using Cocoa bindings technology and the QCPatchController. I've provided a link to this project so you can see how I did it: Convolver.zip
The first thing you need to do to use these in your projects is to add the Quartz Composer palette to Interface Builder. To do this:
Open Interface Builder Preferences:
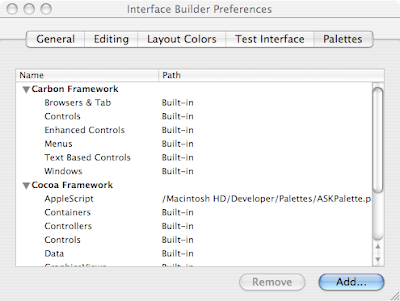 IB preferences showing palettes tab
Click the Add... button:
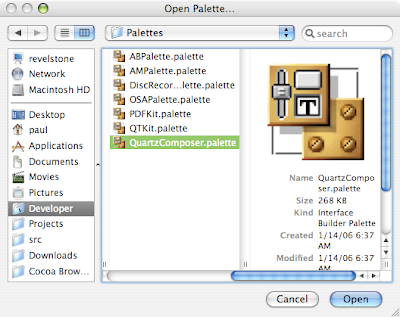 selecting the QuartzComposer palette
You will get this new palette in Interface Builder.
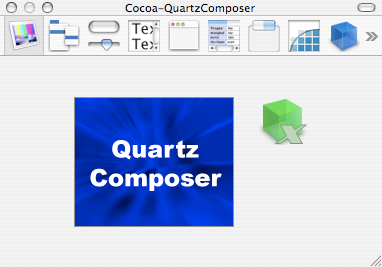 the Quartz Composer palette
Next, we need to copy the test.qtz composition into the bundle for our application. It doesn't really matter where you put it. For our purposes, we just need to make sure that it is packaged with the app when it ships. After that we need to open the composition and make sure that we publish all the inputs that we care about so that the QCPatchController can access them. In order to do this, you have to right-click on whatever patches in you composition have external inputs or outputs and check off each one you wish to publish. As far as I've been able to tell, there are no shortcuts to this, you have to select each one individually.
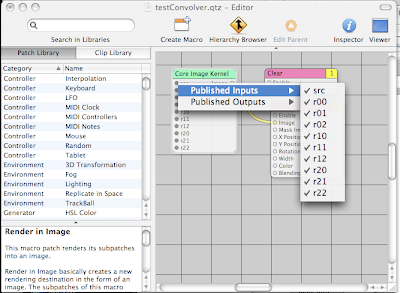 Publishing inputs from the compostion
Whatever you name the inputs or outputs at this point is the key that will be used to access that parameter later.
Now that we have a properly set up composition, we have to modify the original project to use the QCView and QCPatchController instead of old-school target/action. First thing to do is to replace the outputImage NSImageView on the right of the main window of the app with a QCView. Then, drag a QCPatchController into the nib file. I set the erase color of the QCView to transparent to avoid the large black square on the right side of the application when it starts.
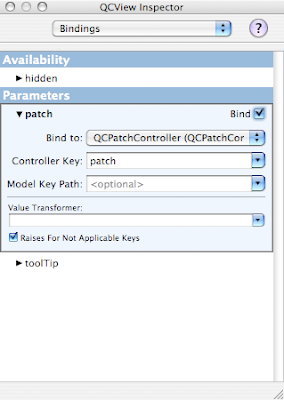
Next., we'll go ahead and set up the bindings for the project. The QCView's patch binding is bound to the patch key on the QCPatchController.
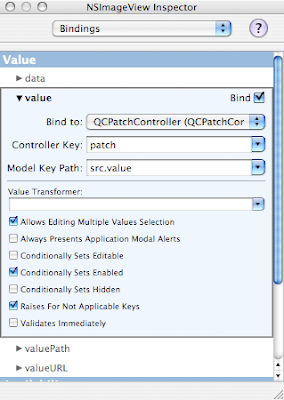
We set the value binding of the NSImageView to the patch of the QCPatchController with the src.value key path.
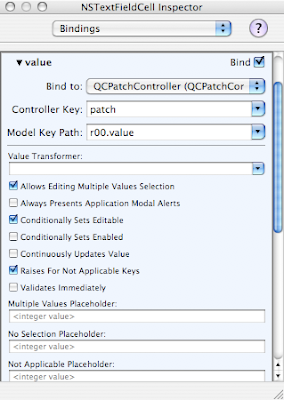
Finally, each cell of the NSMatrix gets bound to the correct value in the composition:
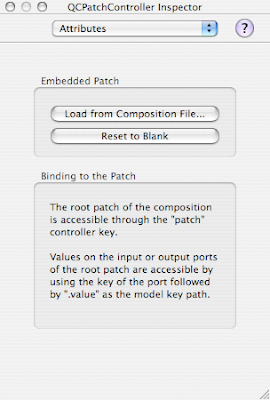
The final piece of this setup is to load the composition into the QCPatchController
Now, you can actually test the working application from within IB. If you choose File->Test Interface and drop an image on the left image view you will see the convolved output image displayed on the right. Of course, this is exploring the barest minimum of the possibly utility of Quartz Compositions and QCView.
This has greatly reduced the amount of Objective-C code we need to write to build this application. The entire Convolver class that converted the image to a CIImage, called the filter and reconverted the result back into an NSImage is not needed any more. I still want to be able to select File->Open... to drop down a sheet and open the image, so that's really the only thing I need the ConvolutionController to do at this point. There turns out to be one small catch that I'll point out when I get to it.
Here's the new header for the ConvolverController class:
Some of you may look at this and wonder why I need a pointer to the resultImage any more since the bindings should take care of it. That's where the catch comes in, as you'll see below.
/* ConvolverController */

#import <Cocoa/Cocoa.h>
#import <QuartzComposer/QuartzComposer.h>
#import <QuartzCore/QuartzCore.h>/span>


@interface ConvolverController : NSObject
{
    IBOutlet QCView *resultImage;
    IBOutlet NSImageView *sourceImage;
    IBOutlet NSWindow *window;
}
- (IBAction)openImage:(id)sender;
@end
This is the source code for the class:
#import “ConvolverController.h“


@implementation ConvolverController

- (IBAction)openImage:(id)sender
{
    NSOpenPanel *panel = [NSOpenPanel openPanel];
    [panel beginSheetForDirectory: nil
                             file:nil
                            types:
               [NSImage imageFileTypes]
                   modalForWindow: window
                    modalDelegate:self
                   didEndSelector:
  @selector(openPanelDidEnd:returnCode:contextInfo:)
                      contextInfo:nil];
}

- (void)openPanelDidEnd:(NSOpenPanel *)panel
           returnCode:(int)returnCode
          contextInfo:(void  *)contextInfo{
    NSArray *files = [panel filenames];
    NSString *filename = [files objectAtIndex:0];
    NSImage *image = [[[NSImage alloc]
    initByReferencingFile:filename]
       autorelease];
    [sourceImage setImage: image];
    [resultImage setValue: image forInputKey: @“src“];
}
@end
This is normal sheet handling code, just like in the previous project, but a little simpler. The catch comes in when I have to call [resultImage setValue: image forInputKey: @“src“] even though you might think that the bindings for NSImageView should automatically be updated, they are not. Apparently it's an already filed bug and this one line of code provides a simple workaround.
So, that ends the journey of building a Cocoa app with a custom Core Image filter. Hope it was useful to you. This was a very simple example, there's so much more that can be done with these amazing technologies. Until next time, happy coding!
6 comments:
It looks to me that since Leopard, the "Forward all events" option for QCViews in IB3 is broken, in the sense that it simply doesn't work. Is it the same for you? should we post a ticket to Apple?
Paolo-
Yes, it looks to me like it is broken. Thankfully there's an easy workaround. Yes, a bug should be filed with Apple.
Paul
An easy workaround? could you share it with us?
Sure, look at the post I published over the weekend.
It looks like a need a password to download your convolve.zip file. Im doing some IB / QC bindings and would love to look at how you did it youself.
Regards,
Adrian
Adrian-
Try again. I moved the file on to Google Sites.
Post a Comment